> For the complete documentation index, see [llms.txt](https://faq.wanttopay.net/wanttopay-app/llms.txt). Markdown versions of documentation pages are available by appending `.md` to page URLs; this page is available as [Markdown](https://faq.wanttopay.net/wanttopay-app/english/oshibki-i-resheniya/oshibki-google-payments/nastroika-platyozhnogo-profilya-google.md).
# Setting up a Google payment profile
Before making payment, make sure the payment profile is set up correctly.
#### Be sure to check:
* the country of the payment profile
* address (must match the selected country)
* profile owner's name (must be entered in full, in Latin characters)
* card region matches the profile region
#### Common mistakes:
* using a region and address that do not match the card region
* fake or incorrect addresses
* first and last name in the Google payment profile or when adding a card are filled in incorrectly
{% hint style="info" %}
We recommend: close all active payment profiles in the account and create a new one, matched to the card's billing address region.
{% endhint %}
***
### How to set up a Google payment profile
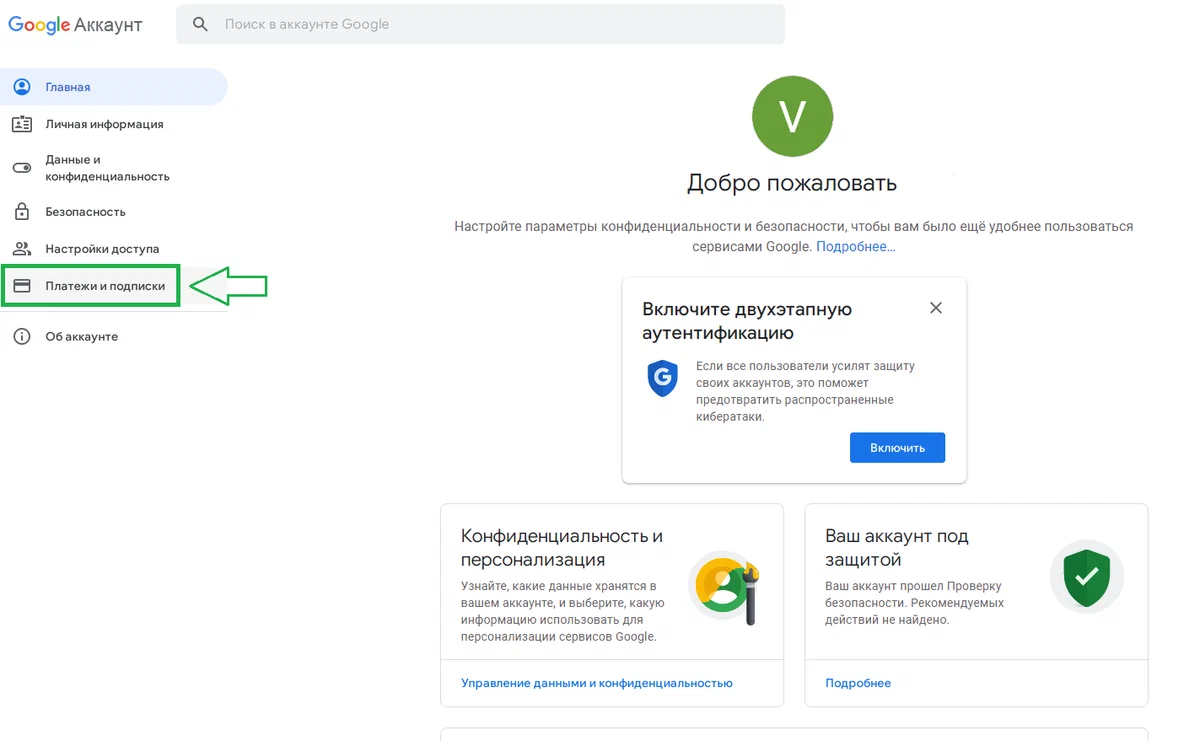
Go to “Account management” → “Payments and subscriptions.”
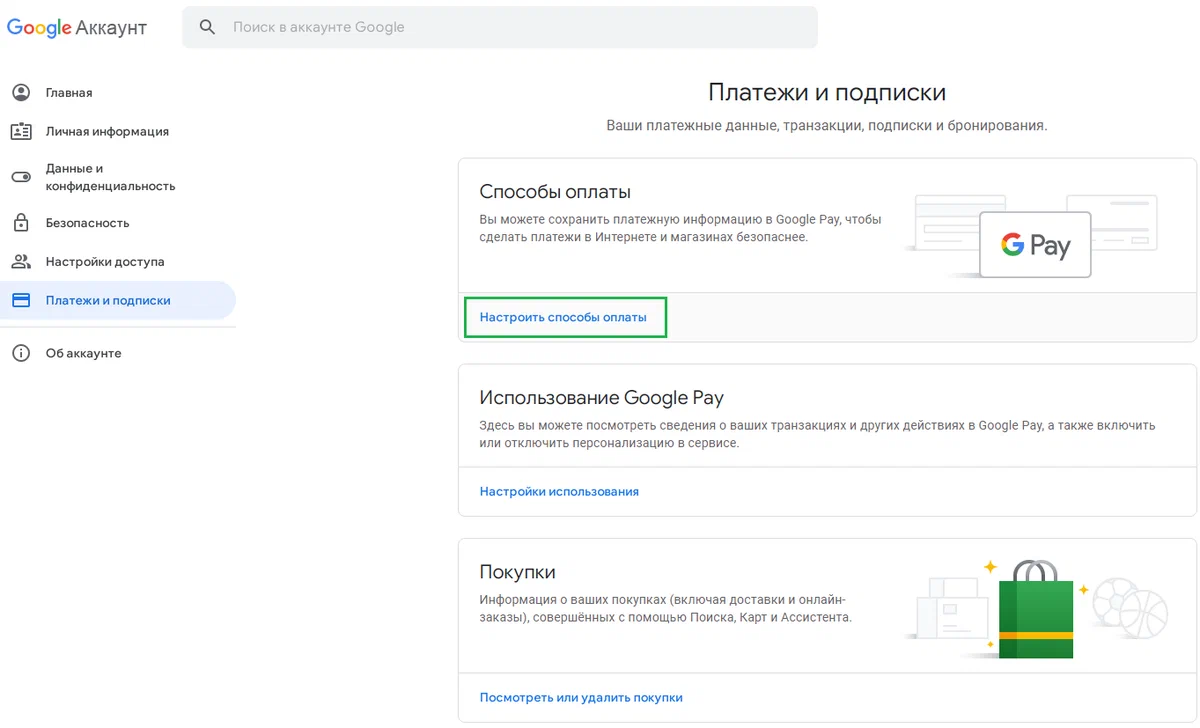
Click “Set up payment methods.”
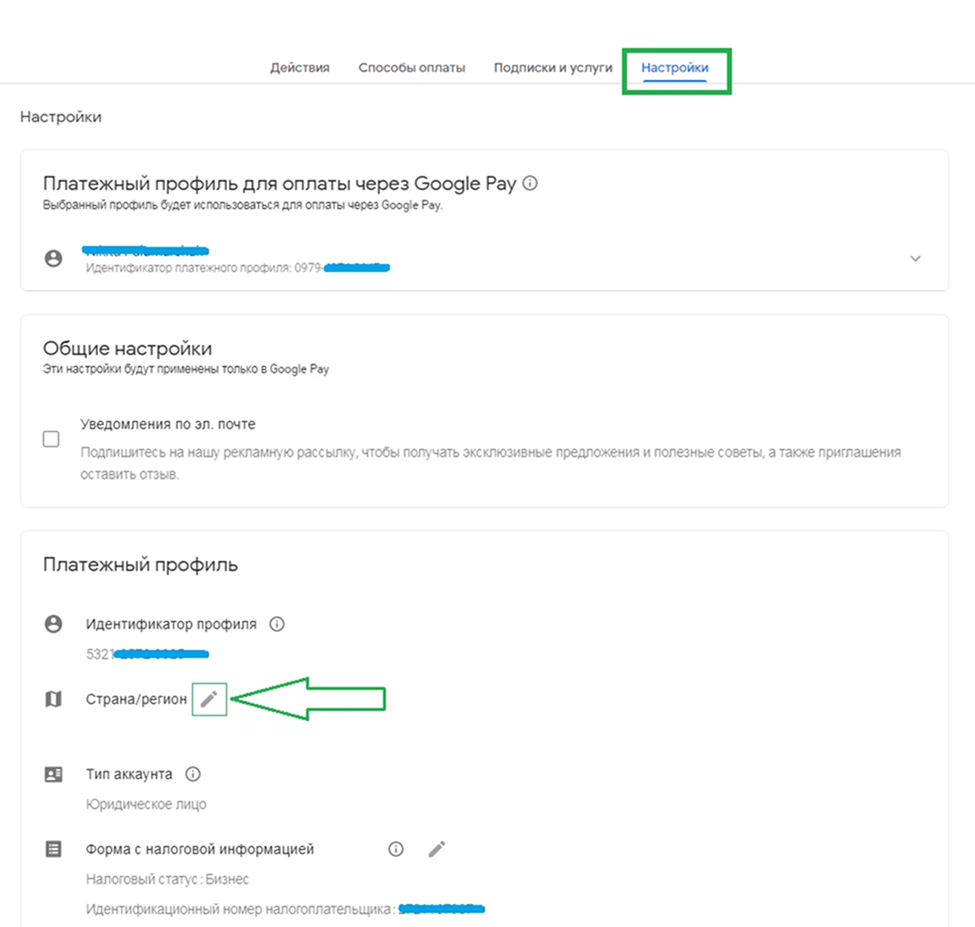
Go to “Settings” → “Payment profile.” Find the “Country/region” line and click the pencil icon.
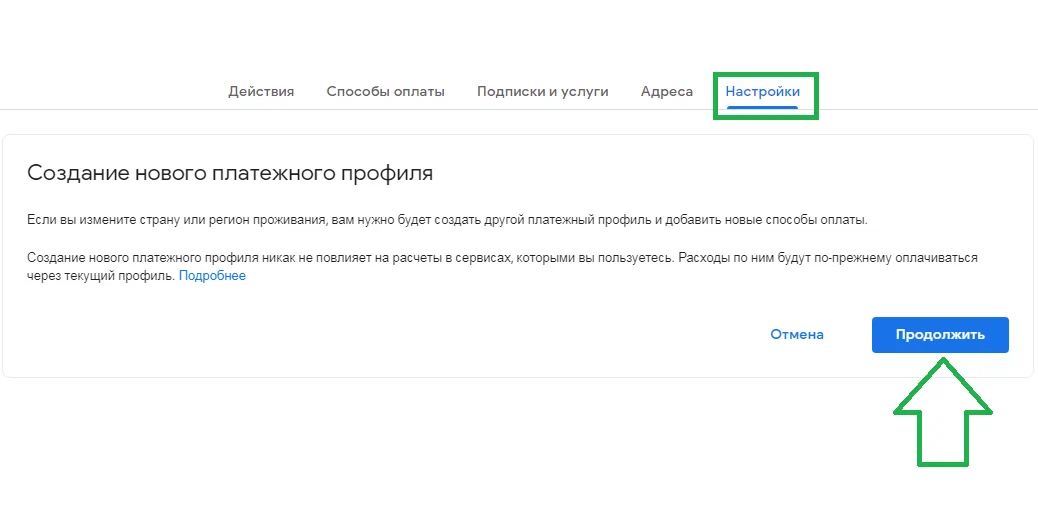
Accept the terms and click “Continue.”
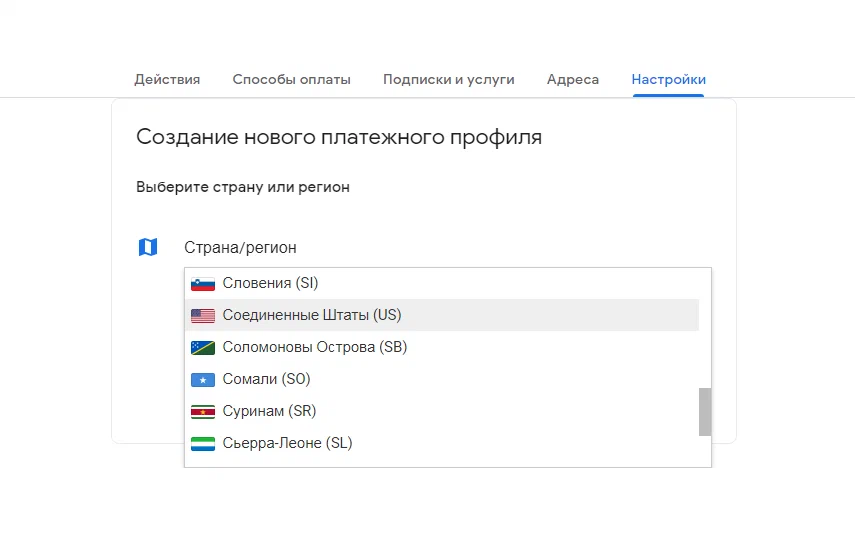
Select “United States (US)” — according to your card's billing address.
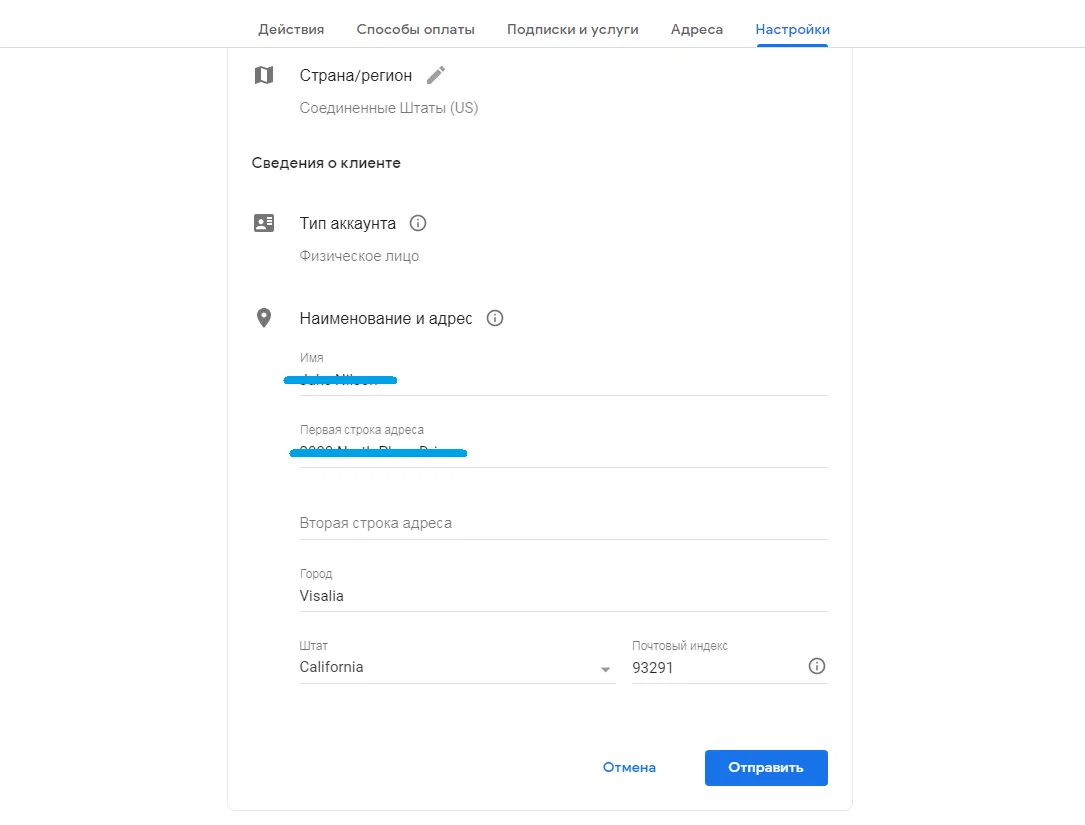
Fill in the billing details. The billing address can be found in the card details.
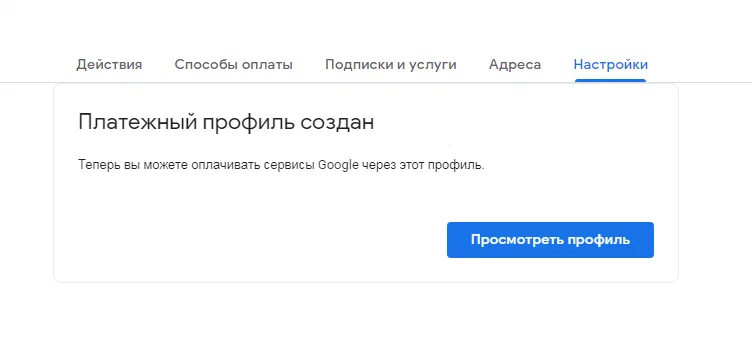
If everything is filled in correctly, the message “Payment profile created” will appear. Click “View profile.”
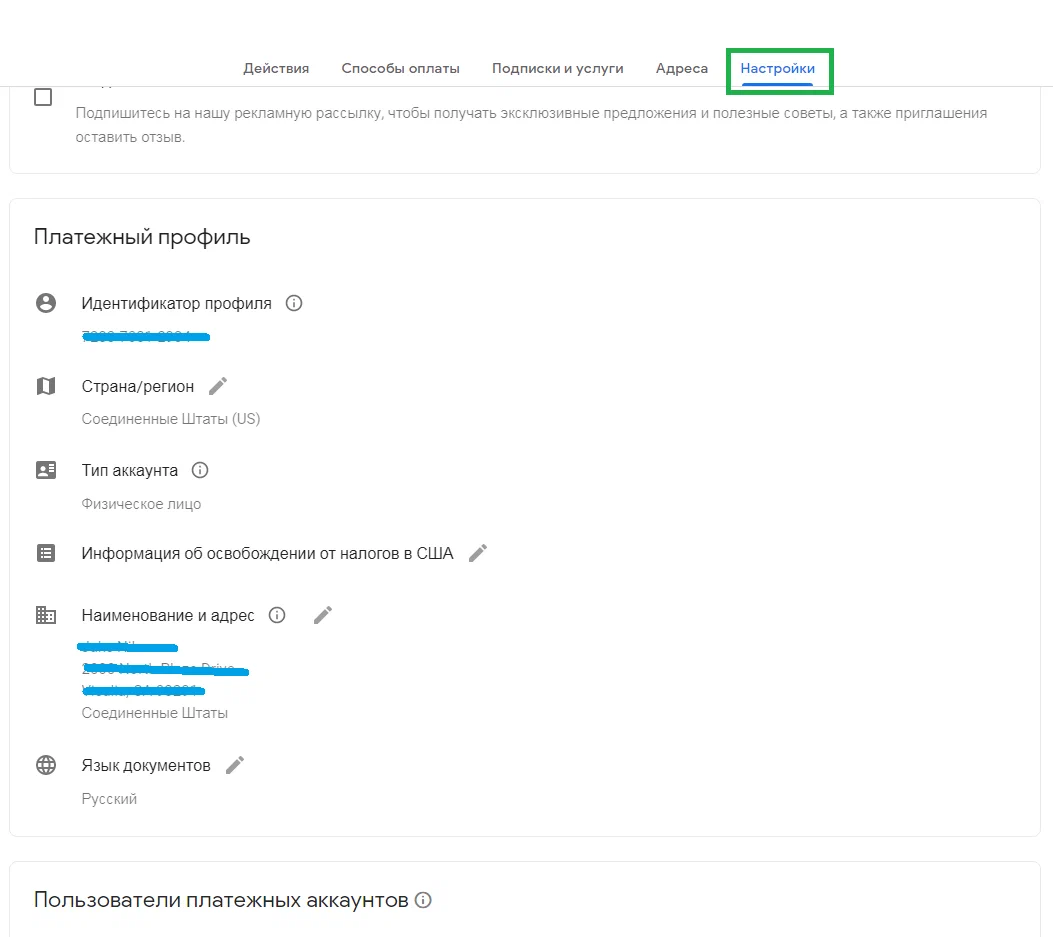
We can see that the new profile details have indeed been successfully entered.
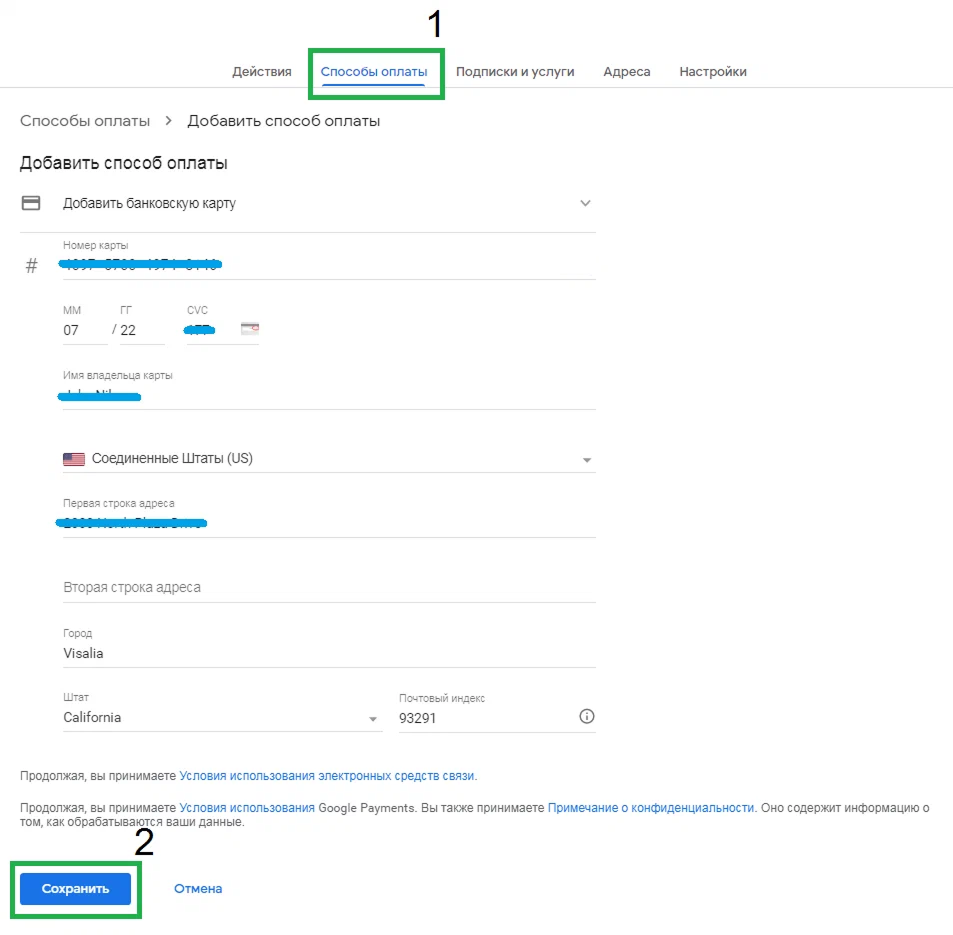
Go to the “Payment methods” tab → “Add payment method,” enter the card details, and click “Save.”
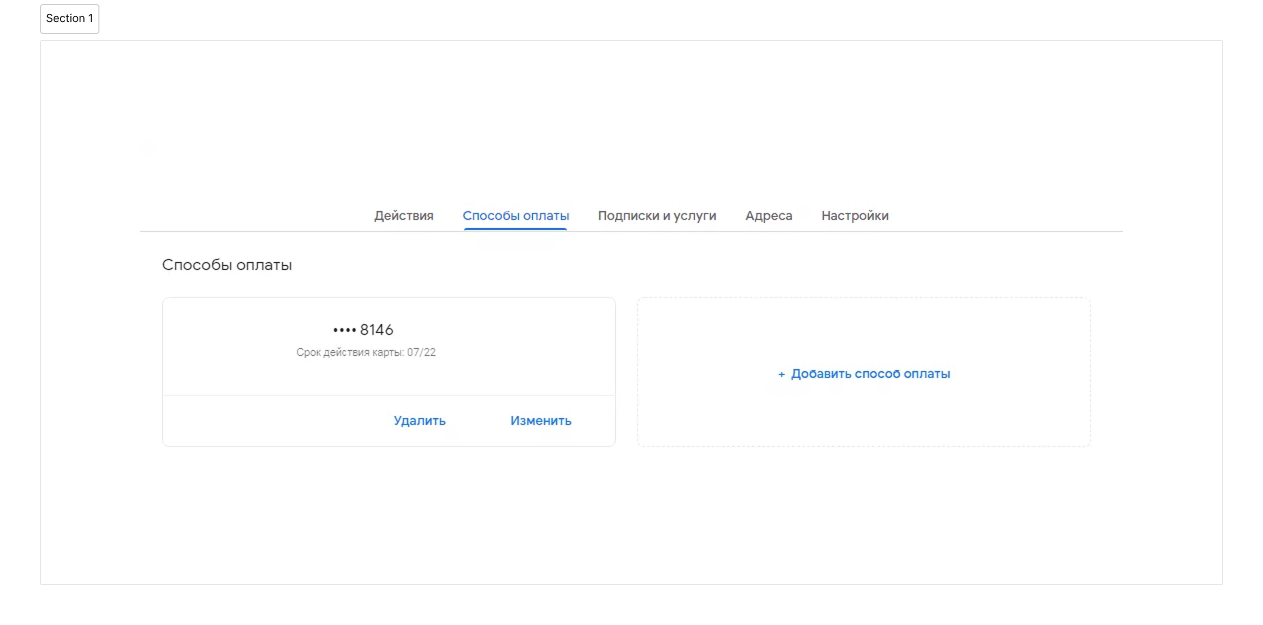
The card has been successfully linked. Now delete the old payment profiles — leave only the one you just created.
### **Deleting the old payment profile**
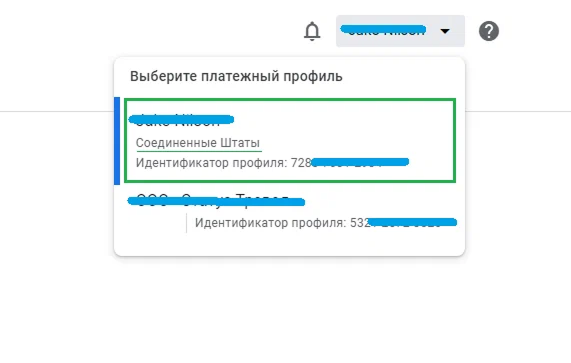
If you have several profiles, switch between them using the account icon in the upper-right corner. Select the profile with the wrong country.
{% hint style="info" %}
*If you have two or more profiles, you need to keep only one linked virtual card and delete the rest.*
{% endhint %}
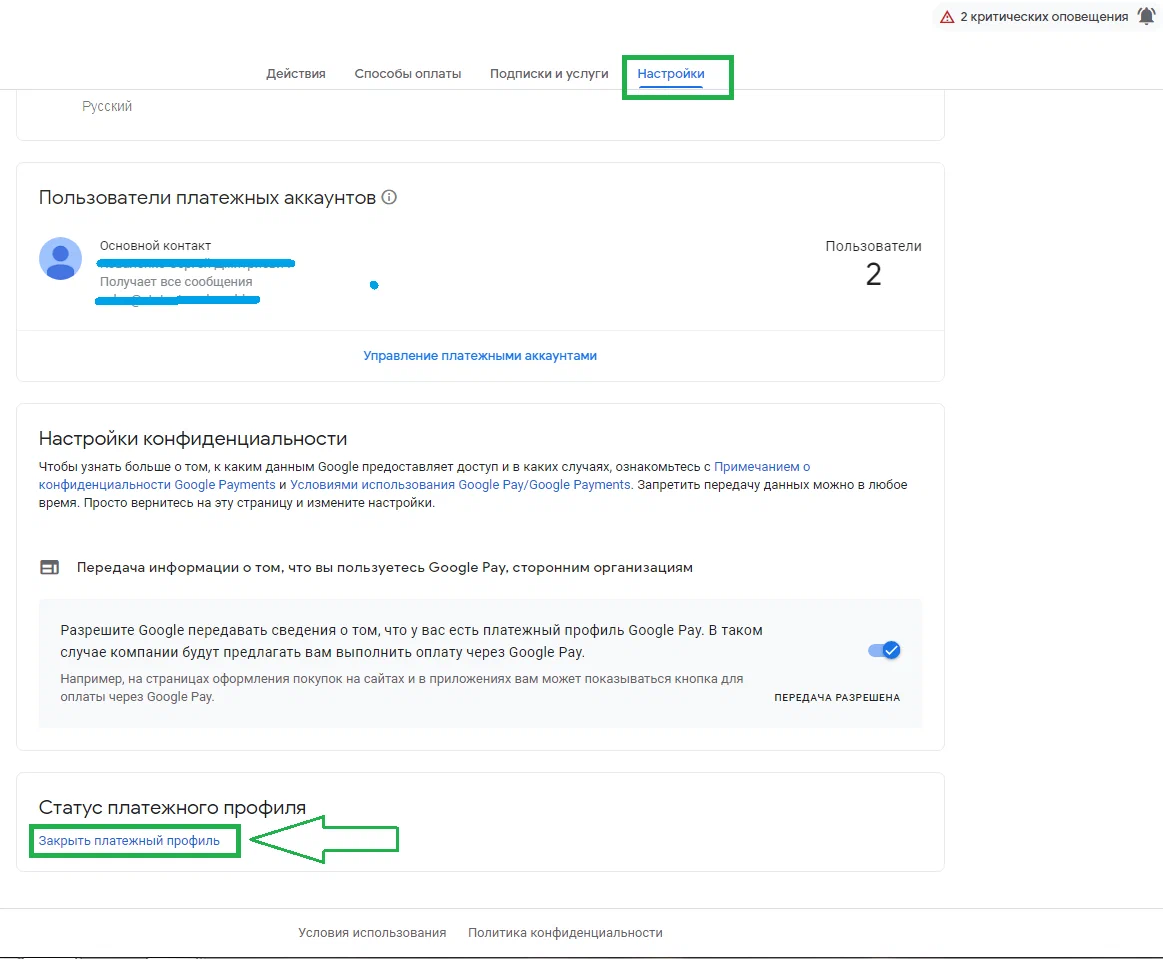
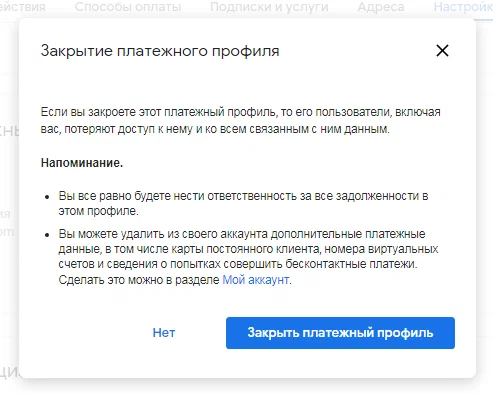
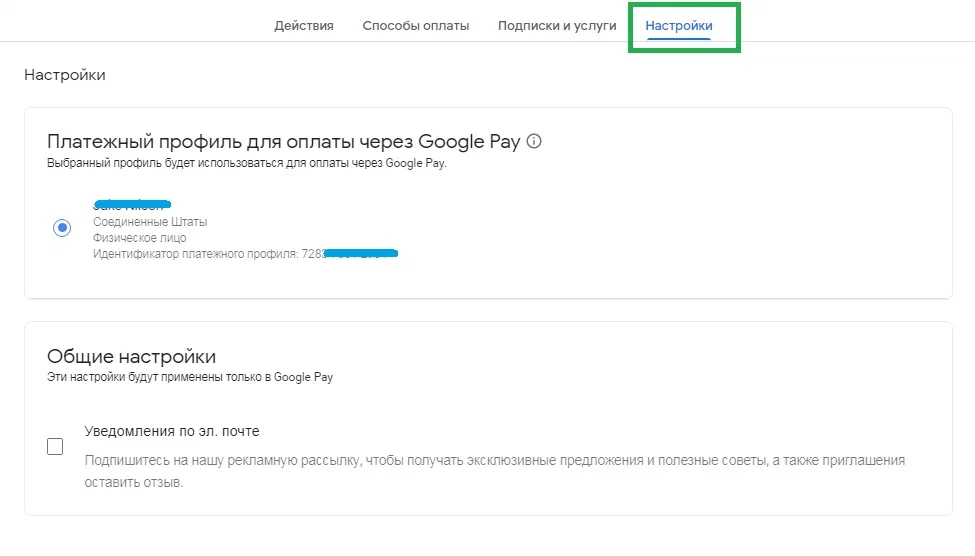
You will be redirected to “Settings.” Scroll down to the “Payment profile status” section and click “Close payment profile.”
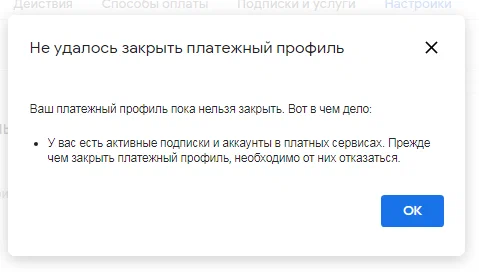
If there are active subscriptions on the old profile, click “OK” and go to the “Subscriptions and services” tab. Pause all active subscriptions and paid content from Google.
{% hint style="info" %}
***Important:** if you cannot cancel one of the subscriptions, you will have to create a new Google account. Therefore, we recommend disabling all subscriptions in advance, before linking the new payment profile.*
{% endhint %}
Read the terms and click “Close payment profile.”
Go to “Settings” and confirm the new profile as the primary one — click the button next to its name. After that, the profile selection section will disappear, leaving only “General settings.”
Done! The card is linked, there is one profile. You can use Google services.
---
# Agent Instructions
This documentation is published with GitBook. GitBook is the documentation platform designed so that both humans and AI agents can read, navigate, and reason over technical content effectively. Learn more at gitbook.com.
## Querying This Documentation
If you need additional information that is not directly available in this page, you can query the documentation dynamically by asking a question.
Perform an HTTP GET request on the current page URL with the `ask` query parameter, and the optional `goal` query parameter:
```
GET https://faq.wanttopay.net/wanttopay-app/english/oshibki-i-resheniya/oshibki-google-payments/nastroika-platyozhnogo-profilya-google.md?ask=&goal=
```
`ask` is the immediate question: it should be specific, self-contained, and written in natural language.
`goal` is optional and describes the broader end goal you are ultimately trying to accomplish on behalf of the user. GitBook uses it to tailor the answer towards what is most useful for that goal.
The response will contain a direct answer to the question and relevant excerpts and sources from the documentation.
Use this mechanism when the answer is not explicitly present in the current page, you need clarification or additional context, or you want to retrieve related documentation sections.